Over time computer hardware gets old, and as a result, it needs to be replaced. Although new gear can be exciting, it comes with the hassle of transferring your software. When we change the hardware running SOLIDWORKS, be it a client with a stand-alone license or a server running the SolidNetWork License Manager, it will require us to deactivate the serial number used for the installation.
In this blog post, I’ll give you step-by-step directions on how to deactivate your SOLIDWORKS license.
- PART 1: Deactivating a Stand-Alone License (SOLIDWORKS Installed)
- PART 2: Deactivating a Network License on a SolidNetWork License Manager Server (SOLIDWORKS License Manager Installed)
- PART 3: Deactivating a Stand-Alone License or Network License (SOLIDWORKS Product Uninstalled)
PART 1: Deactivating a Stand-Alone License (SOLIDWORKS Installed)
STEP 1: Open the latest version of SOLIDWORKS installed on your computer. This can be done using the Desktop Shortcut or the Start Menu.
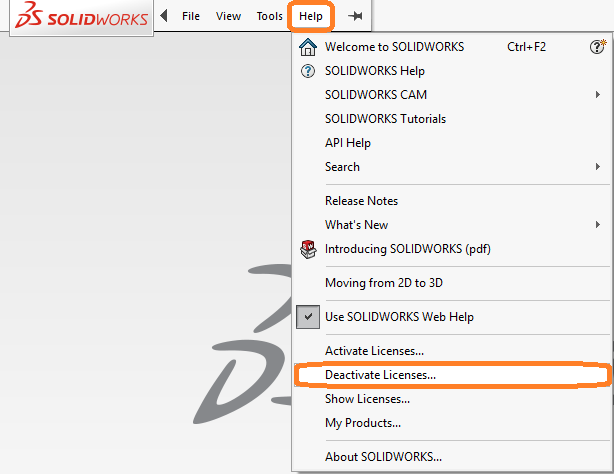
STEP 2: Select the Help Menu then Deactivate Licenses.
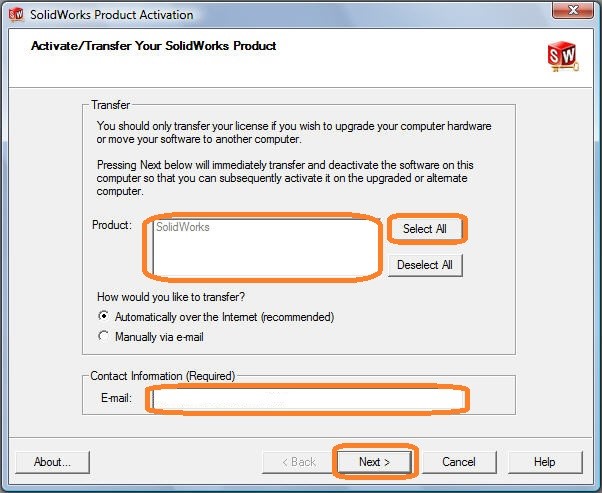
STEP 3: Choose Select All from the SOLIDWORKS Product Activation Window, verify the e-mail address is correct, and hit Next.
STEP 4: Upon successful completion, a window should appear stating the Deactivation Succeeded. Select Finish.

PART 2: Deactivating a Network License on a SolidNetWork License Manager Server (SOLIDWORKS License Manager Installed)
STEP 1: Open the SolidNetWork License Manager. Browse the Start Menu into the SOLIDWORKS folder then SOLIDWORKS Tools folder and select SolidNetwork License Manager.

STEP 2: Select the Server Administration tab and choose Modify for Deactivation.

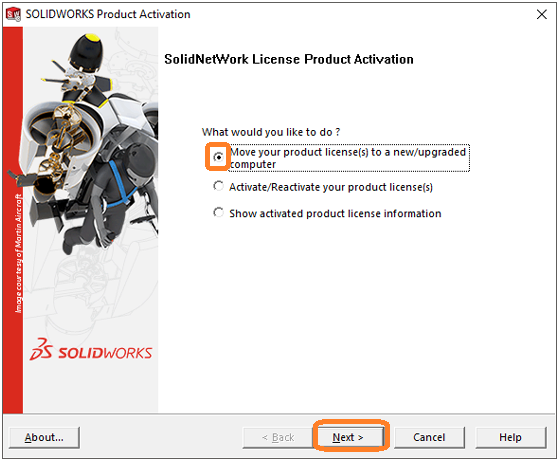
STEP 3: Select Move your product license(s) to a new/upgraded computer and hit Next.

STEP 4: Verify that the listed Serial Number(s) and e-mail address are correct, then continue by clicking Select All and Next.

STEP 5: Upon successful completion, a window should appear stating the Deactivation Succeeded. Select Finish.
PART 3: Deactivating a Stand-Alone License or Network License (SOLIDWORKS Product Uninstalled)
STEP 1: Log in to the SOLIDWORKS Customer Portal. If a Customer Portal Account has not been created see our website https://www.logicalsolutions.in/how-to-create-solidworks-customer-portal-login/which shows you how to access your account.
STEP 2: Select Downloads and Updates from the main page after login.

STEP 3: Choose the SW Activation Wizard and save the file to the computer.
STEP 4: Select Open folder to show the file in the same location.

STEP 5: Right-mouse clicks the file and choose Run as Administrator.

STEP 6: Choose Unzip and open the folder.

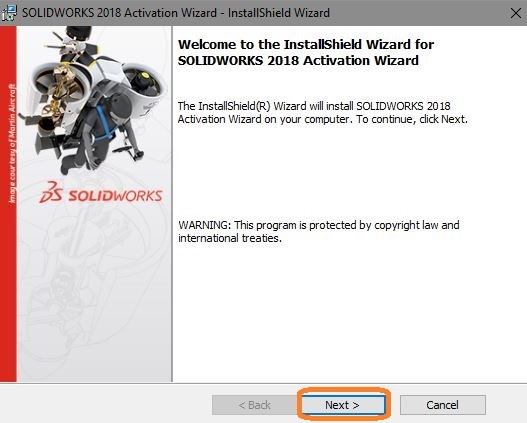
STEP 7: Choose Next twice.

STEP 9: Choose Finish.

STEP 10: From the Start Menu > Recently added Choose SOLIDWORKS Activation Wizard.

STEP 11: Select Move your product license(s) to a new/upgraded computer and hit Next.
STEP 12: Choose Select All from the SOLIDWORKS Product Activation Window, verify the e-mail address is correct, and hit Next.

STEP 13: Upon successful completion, a window should appear stating the Deactivation Succeeded. Select Finish.

To get more updates on SOLIDWORKS Follow Us on LinkedIn: Click Here
For more details Like Us on Facebook: Click Here
For videos SUBSCRIBE to our channel: Click Here
For more information: Click Here